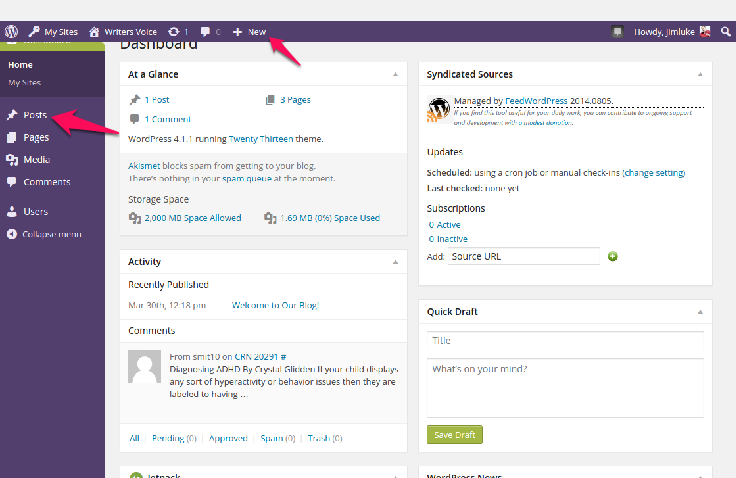
Login and go to the Dashboard. It should look like this just after you login:
Roll your mouse over EITHER of the two links that the red arrows point to in the above screen shot. One is at the top of the screen on the “tool bar” and it says
“+ NEW“. Roll over it, a menu appears and you then click on “Post”.
Or, you can roll your mouse over to the menu bar on the left side of the page. Again, roll over where it says “POSTS”, and a menu appears. Click on “Add New”.
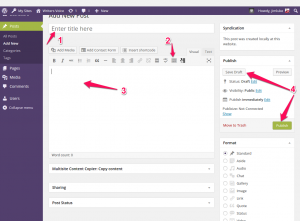
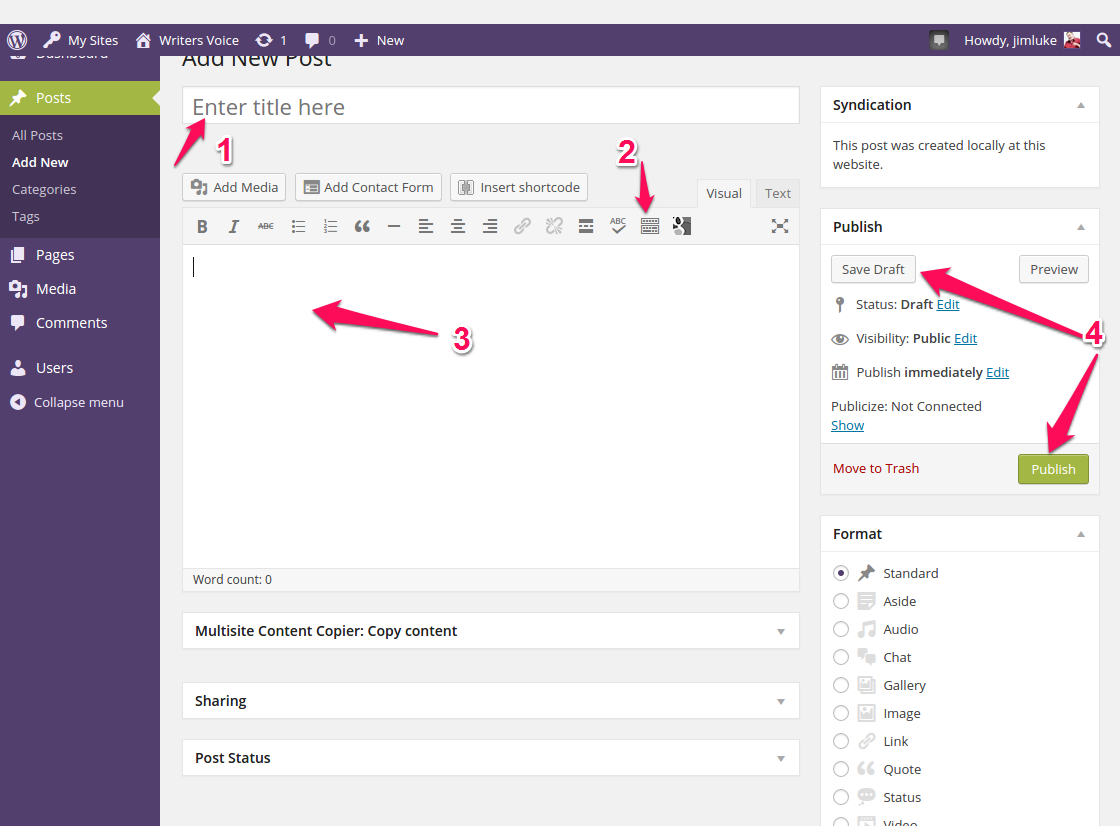
Now you will be at the Create New Post page in the Dashboard. You need to do 4 things. These four steps are identified with the red arrows in this screen shot:
Step 1: Type a title for your post. This will be the headline that will be displayed on your post.
Step 2 (optional): click on the little button in the toolbar as shown above. This will open a second line of toolbar buttons to help in styling your post.
Step 3: Write your post content. If you want, you can copy-and-paste from other material you’ve written, perhaps in a word processor. Use Control-V to paste copied material. You can use buttons in the post editor toolbar to style your content.
Step 4: When you’re done and satisfied with the post, click on the big PUBLISH button. If you’re not finished but want to save it to work on later, click on “SAVE DRAFT”. Then you can log out. When you come back and log in later, go to the “POSTS” >> “All Posts” on the left side menu and click. Then find your post and re-open it to edit.